CSS
z-index 에 따른 레이어 위치
레이어를 이용하다 보면 서로 겹치는 경우가 흔히 발생을 하게 된다.
이럴경우 겹치는 레이어들은 서로 출력 순서를 가지게 된다.
이러한 것을 처리하기 위해 사용하는 것이 레이어옵션중 z-index 라는 옵션이다.
z-index는 숫자가 높을수록 위로 올라 오게 된다.
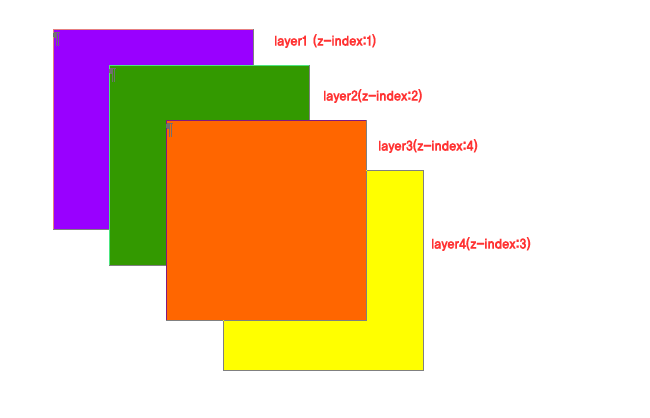
아래 예제에서 4개의 레이어를 만들고 각각 레이어에 1~4번짜기 z-index 번호를 부여를 하게 된다.
3번째와 4번째 레이어의 z-index 순서를 바꿔주면 출력되는 순서가 달라지게 된다.
이러한 형태의 응용으로 홈페이지에 다양한 레이어 표현이 가능하다.
undefined
01.<html>02.<head>03.<meta http-equiv="content-type" content="text/html; charset=euc-kr">04.<title>z-index 알아보기</title>05.</head><body bgcolor="white" text="black" link="blue" vlink="purple" alink="red">06.<div id="layer1" style="background-color:rgb(153,0,255); width:200px; height:200px; position:absolute; left:209px; top:106px; z-index:1;">07.</div>08. 09.<div id="layer2" style="background-color:rgb(51,153,0); width:200px; height:200px; position:absolute; left:265px; top:142px; z-index:2;">10.</div>11. 12.<div id="layer4" style="background-color:yellow; width:200px; height:200px; position:absolute; left:379px; top:247px; z-index:4;">13.</div>14. 15.<div id="layer3" style="background-color:rgb(255,102,0); width:200px; height:200px; position:absolute; left:322px; top:197px; z-index:3;">16.</div>17.</body>18.</html>
이 게시물을
번호
분류
제목
CSS
CSS
CSS
CSS
CSS
